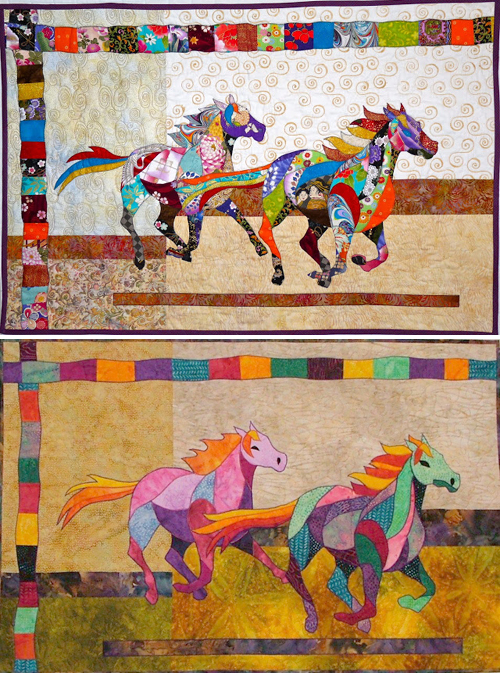
Horse Quilt Patchwork
A Horse Patchwork, also known as a Horse Quilt, is a decorative quilt made from small pieces of colorful fabric. In this simple guide, we’ll explain step by step how to make your own Horse Patchwork, so you can have fun and create a unique and beautiful piece!
Necessary materials:
Colored fabrics (in colors of your choice)
Scissors
Ruler
Sewing machine (or needle and thread if you prefer to sew by hand)
Cutting board (optional, but recommended for precise cuts)
Horse template (can be printed or hand-drawn on card stock)
Step 1: Choosing the pattern and fabrics
To start, decide what size you want your horse to be in the quilt and find a matching pattern. It can be a drawing found on the internet or one that you make yourself. Then choose the colored fabrics that will be used to fill in the outline of the horse. Use your imagination and combine colors that go well together.
Step 2: Cutting the Fabrics
With the horse pattern in hand, place it on the chosen fabrics and carefully cut around it with scissors. Repeat this process for each fabric color you want to use in Patchwork.
Step 3: Assembly of Patchwork
Now it’s time to assemble the Horse Patchwork! Arrange the cut pieces of fabric on a flat surface, such as a table or floor, and position them according to the outline of the horse. You can layer the fabrics, creating an interesting and colorful look.
Step 4: Sewing
With the fabric pieces in the desired position, start sewing the edges together. If you are using a sewing machine, line up the fabrics and sew along the edges with a small seam allowance (about 0.5 cm). If sewing by hand, use a needle and thread to sew the fabrics together with tight stitches.
Step 5: Adding details (optional)
If you want to give your Horse Patchwork more personality, you can add details such as eyes, mane or harness. Use different fabrics or even embroidery to create these elements.
Step 6: Assembling the quilt
After finishing the horse, you can create the rest of the quilt. Cut larger pieces of fabric for the quilt bottom and back. Position the horse in the center of the front, then place the back fabric with right sides of the fabrics together. Sew around the edge, leaving a small opening to turn the quilt right side out.
Step 7: Finalization
Turn the quilt right side out through the opening you left, then close the opening with invisible stitches. Now your Horse Patchwork quilt is ready!
Making a Horse Patchwork is a fun and creative project that can be enjoyed by people of all ages. With some colorful fabrics, a sewing machine or a needle and thread, you can create a unique and charming quilt that will be treasured for years to come. Let your imagination run free and have fun creating this beautiful handcrafted piece!
Access the free quilt/ Horse Quilt Patchwork pattern
If you liked this quilt model, but still want to see more options, below I’ll leave some news for you:
We wish all our readers a great week full of God’s blessings in their homes, with good health, peace and prosperity and of course, lots of enthusiasm and creativity to start another piece of quilt, with wonderful colors.
These are Crochet Today wishes for you!