Carpenter Star Quilt
A “Carpenter Star Quilt” is a very beautiful and interesting type of quilt that can be made from colorful fabrics. I will explain step by step how you can make your own quilt.
Necessary materials:
Colored fabrics of your choice
Ruler
Scissors
Sewing machine or needle and thread
Iron
Step 1: Choose fabrics
First, you will need to choose the fabrics that will be used for your quilt. It may be a good idea to select colors and prints that go well together.
Step 2: Cutting the Fabrics
Now, cut the fabrics into squares of the same size. Generally, you can cut 4- or 5-inch squares, but this can vary based on the size of quilt you want to make.
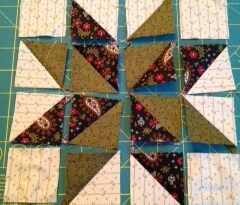
Step 3: Assembly of the Carpenter Star block
The Carpenter Star block is made up of two main parts: a larger square in the center and eight triangles around it. To create the triangles, you can cut the squares in half diagonally, forming two triangles from each square.
Step 4: Organizing the pieces
Now it’s time to arrange the pieces to form the quilt pattern. Place the largest square in the center and, around it, position the triangles symmetrically, so that the colors and prints fit together harmoniously.
Step 5: Sewing
After arranging the pieces, it’s time to sew the triangles around the center square. Take two triangles and align their edges with the edges of the square, with the right side of the fabric facing inward. Sew along the edges to join the pieces together. Do this for all eight triangles.
Step 6: Press the seams
After sewing the triangles, press the seams with an iron to make everything nice and flat.
Step 7: Assembling the blocks
You will now assemble the Carpenter Star blocks into a layout. Join the blocks, one next to the other, to form the rows of the quilt. Then sew the rows together to create the quilt top.
Step 8: Padding and Lining
The quilt top will be ready. Now, to finish, place the quilt and lining under the top and pin the three layers together so they don’t move while you sew.
Step 9: Quilting
Quilting is the step where you sew the three layers together to secure them. You can do this by hand or by machine, following a sewing pattern of your choice.
Step 10: Finishing
After quilting, cut the excess fabric and finish the edges of the quilt.
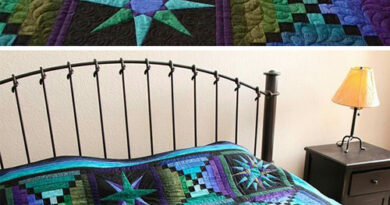
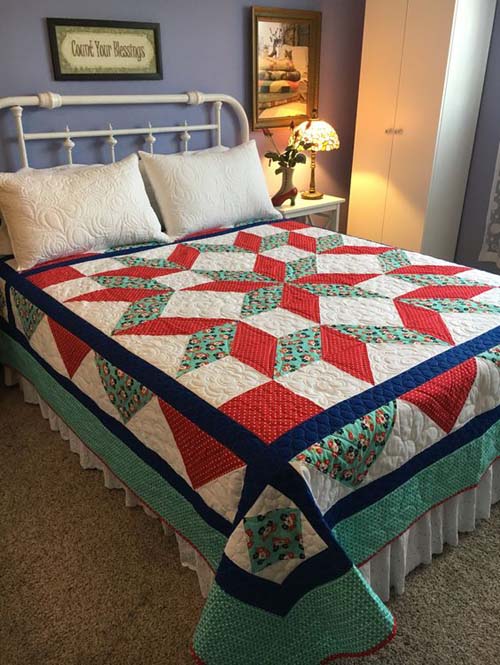
Congratulations! Now you have a beautiful Carpenter Star Quilt ready to be used or displayed as a special craft work. Remember that practice makes perfect, so don’t worry if your first try isn’t perfect. With time and experience, you will be able to make more and more beautiful quilts!
Access the free quilt pattern/ Carpenter Star Quilt
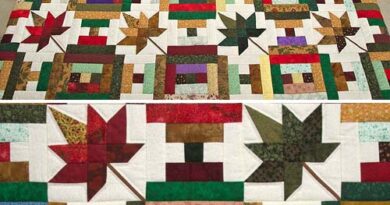
If you liked this quilt model, but still want to see more options, below I’ll leave some news for you:
String Quilt Blocks Tutorial
Lemoyne Star Quilt
Autumn at the Courthouse Quilt
We wish all our readers a great week full of God’s blessings in their homes, with good health, peace and prosperity and of course, lots of enthusiasm and creativity to start another piece of quilt, with wonderful colors.
These are Crochet Today wishes for you!