Easy Crochet Bag Pattern |Step By Step|Tutarial
Easy Crochet Bag Pattern. Crochet is the fabric of our dreams. It’s versatile, comfortable, and able to elevate any outfit. And what’s not to love about a project that can be done in just a few hours? That’s why we wanted to share with you our easy crochet bag pattern.
This simple project is perfect for beginners and can be completed in just a few hours. Plus, it makes the perfect gift for anyone on your list! Ready to get started? Check out our step by step guide below!
Crochet Bag Pattern: What you need for this project
Materials:
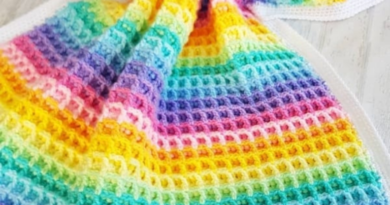
– Worsted weight yarn in light colors, for the main body of the bag
– Jumbo crochet hook (9.00 mm)
– Yarn needle
– Black felt
– Stitch markers
How to make the basic Crochet Bag Pattern
There are many variations of crochet bags, so this is just a basic one. Make it as big or small as you like. The measurements given are for an 18” bag. If you make it any smaller, the strap will be too short.
1) Chain 100 (or whatever desired length you want your strap to be).
2) Work 6 sc in first ch from hook. Do not join into ring.
3) Work 2 sc in each st around (12 sts). Do not join into ring.
4) Work 3 sc in next st, 2 sc in next st, 1 sc in next 2 sts (15 sts). Do not join into ring.
5) Work 4 sc in next st, 3 sc in next st, 2 sc in next 3 sts (18 sts). Do not join into ring.
6) Work 5 sc in next st, 4 sc in next st, 3 sc in next 4 sts (21sts). Do not join into ring.
7-9)Work 7sc evenly spaced around (21sts). DO NOT JOIN INTO RING!
10)Work 1sc in each of remaining 19 sts (20sts). DO NOT JOIN INTO RING!
11-13)Work 9sc evenly spaced around (20sts), then do a final round of 7sc on top of last 20st loop formed (17sts). DO NOT JOIN INTO RING!
14) Cut yarn, leaving a long enough tail to weave in later. Weave in all ends.
15) Put bag inside out, so the opening is facing you. Stitch the opening closed using a whip stitch or a slip stitch.
16) Turn the bag right-side out and topstitch around the entire edge of the opening, using a 1” seam allowance.
17) Weave in all ends.
Adding a flap
Is perfect for beginner crocheters. It is simple to follow with detailed instructions and only takes a few hours to complete. The finished bag measures approximately 10 inches wide by 6 inches tall and 8 inches deep. You will need light worsted weight yarn in two colors, a J hook, and some stuffing material.
To begin, create a magic ring and chain 2. Work six double crochets into the ring (2dc in each stitch). Slip stitch into the first double crochet and chain 1. *Work one dc in next stitch, work one sc in next stitch; rep from * twice more.
Change to the other color and work three sc in each of the next two stitches, working two sc together at the end of each row for a flap. Fasten off, leaving a long tail for sewing. Sew flap onto front of bag opposite opening. Stuff bag with fiberfill before closing opening with an extra long sc around edge (see picture below). Weave in all ends securely.
Crochet strap
If you are looking for a quick, easy crochet strap to make, this pattern is perfect for you! The strap can be made in any length you like and it’s very versatile – great for holding your purse, book, or other accessory. The finished strap measures about 18 inches (45 cm).
What You Need:
-Crochet hook size H (5.0 mm)
-Yarn needle
-Scissors
-Fiberfill stuffing
-Stitch markers (optional)
Instructions:
1. Start by chaining 6 and forming a ring. 2. Chain 3 (counts as first dc), work 2 dc into the ring, chain 3, turn.
3. Work 2 dc into each of the next two stitches, *skip the next stitch, work 2 dc into the next stitch; repeat from * until you reach the end of the row, ending with a slip stitch into the beginning chain 3 space.
4. Chaining 1 (counts as first sc), do not turn; continue working in spiral rounds around the ring,.Skipping any skipped stitches on round 5 and all subsequent rounds, work [dc2tog] three times; join with a sl st to top of beg ch-3: 8 sts rem. Cut yarn and leave a long tail for sewing later on.
5. Sew yarn ends together to create a loop big enough to fit around your item(s). Make sure the loop is tight enough so that the strap won’t slip off.
6. Thread the yarn needle and insert it into the loop, pulling the loops tight. Sew the yarn ends together to close up the hole.
7. Weave in any loose ends.
Making the handles
In this crochet bag pattern, you will learn how to make the handles for your bag. This is a great beginner’s crochet project that is simple to follow and can be completed in just a few hours. Once you have completed the handle tutorial, you can then move on to making the rest of the bag using the provided instructions.
To begin, chain 30 (36, 42) stitches and join to form a ring.
Rnd1: Work 2 single crochet into each stitch around; (30, 36, 42) stitches.
Rnd 2: Chain 1 and work 2 single crochets into each of the next 3 stitches, *skip 1 stitch; work 2 single crochets into next stitch*, repeat from * to * around; 30 (36, 42) stitches.
Round 3: Work 1 double crochet into each of the next 4 stitches, *skip 1 stitch; work 1 double crochet into next 2 stitches*, repeat from * to * around; 30 (36, 42) stitches.
Rnd 4: Chain 1 and work 1 double crochet into each of the next 5 stitches, *skip 1 stitch; work 1 double crochet into next 3 stitches*, repeat from * to * around; 30 (36, 42) stitches.
Round 5-11: Repeat Rnd 4. Fasten off after completing Rnd 11. Weave in all ends securely.
Finishing touches
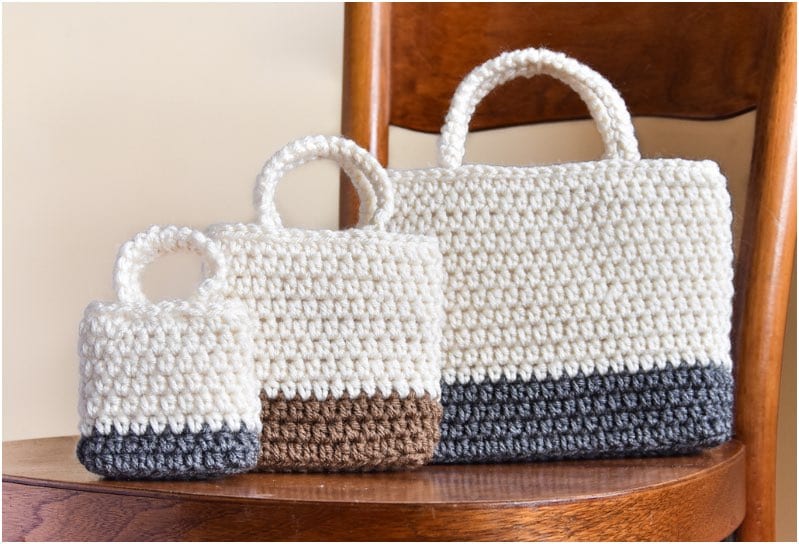
This crocheted bag is perfect for your next trip to the market or a weekend getaway! It’s simple and easy to make, with an adorable, retro look. You can adjust the size of the bag by using different-sized crochet hooks (I used a H/8 [5.0 mm] hook).
The finished bag measures approximately 9 inches wide by 13 inches high. The pattern includes instructions for making the main body of the bag, as well as a flap that extends over one side.
To make the flap, start by crocheting a chain equal to the desired length of the flap. Make sure that you end your chain with a slip stitch so that you don’t have any holes in your flap. Then, work your stitches in rounds (try not to twist your chain), and join your round with a slip stitch at the top of your chain.
Next, work your slip stitch into each stitch around the edge of your flap. Be sure to leave a 2-inch tail before attaching it to your body of the bag. Now, attach your flap to the body of the bag by working a row of single crochets across both layers (to secure it). You’re done! Your Crochet Bag is now complete!
If you liked this article, share and like on Facebook.
Please tag your photos on facebook and post your final result in my group.
JOIN THE FACEBOOK GROUP CLICK HERE
Learn how to make Easy Crochet Bag Pattern |Step By Step|Tutarial:
Access the free pattern / Easy Crochet Bag Pattern |Step By Step|Tutarial
If you liked this pattern but want to see more options for patterns to make with crochet yarn, below we leave some more models for you to be inspired by:
Crochet Angel Patterns for Christmas
How to Make Quick Crochet Blanket Borders
07 Crochet Baby Dress Pattern Free
The 5 Best Crochet Patterns For Blankets
See Now A Beginner’s Guide to Crochet!
Simple Crochet Patterns For Beginners
Kids’ Crochet Dresses: How To Make
All of us had a great week, full of God’s Desired houses in their works, and a lot of creativity to start another project mainly with crochet yarn.
With love and affection, Crochet To Day Free!