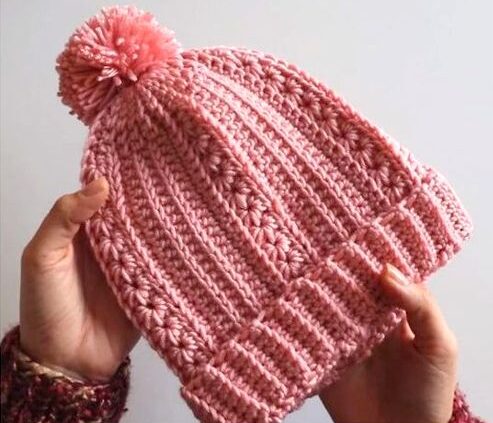
Crochet Hat
Hello! I will guide you with great care and patience to crochet a hat. Let’s create something beautiful together. Remember, crochet may seem complicated at first, but with a little practice, you’ll be amazed at what you can do. Let’s go!
Step 1: Choose your material and tools
First, choose the color of crochet yarn you like best and a crochet hook that fits the size of the yarn. Make sure your hook and yarn match well.
Step 2: Make a slip knot
Start by making a small slip knot at the end of your yarn. This will be the base of your hat.
Step 3: Make a base chain
Make a chain of about 6 to 10 stitches, depending on the size of the hat you want. This will be the width of your hat.
Access another free crochet pattern
Step 4: Close the chain into a circle
Now join the last chain to the first with a single crochet to form a circle. Make sure the circle is not twisted.
Step 5: Start increasing
Now, let’s increase the number of stitches in the circle to increase the size of the hat. Make 2 chains to start, then double crochet into the same spot where you made the chains. That’s a raise. Make one more increase at the same point.
Step 6: Keep increasing
Continue making increases at each stitch around the circle. This will make your hat start to get bigger. Remember to crochet 2 double crochets in each stitch.
Step 7: Continue working in circles
Continue working in circles, making increases with each round until the circle is the size you want for the top of the hat. This will depend on the size of the head you are making the hat for.
Step 8: Start making the body of the hat
Now that the top of the hat is the right size, you can stop increasing. Begin double crochet into each stitch, working in circles. Continue doing this until the body of the hat is the desired length.
Step 9: Finish with a beautiful finish
To finish the hat, cut the yarn, leaving a length of about 10 cm. Thread this piece of yarn through the hook and pull it through the end stitch to create a knot. This will ensure that the hat does not fall apart. Then, hide the loose ends inside the hat with a tapestry needle.
Step 10: Enjoy your crochet hat
Now that your hat is ready, put it on your head and enjoy the amazing work you did! Remember, practice makes perfect, so don’t be discouraged if your first hat doesn’t turn out exactly how you imagined. Over time, you will become a crochet master!
Have fun creating, and remember that each hat is unique, just like you!
If you liked this pattern, but still want to see some other models before starting a new project, below we will leave some more patterns of crafts with crochet threads:
Access the free crochet pattern
We wish you all an excellent week, full of joy, happiness, love and especially lots of yarn to start another beautiful crochet project.
With much love and respect, Crochet Today!